When I head to a website or a blog, most often times it is the images that grab my attention. It is also the images that keep my attention, and again, what will most likely bring me back a second and a third time. I am such a visual person, and I can become instantly inspired upon viewing a beautiful photograph, a page in a book or magazine, or even watching a movie.
Knowing how much photography plays a role in this blog, I decided to spend a good chunk of time on the topic within the fourth and final post of my 5 Year Blogiversary Series.

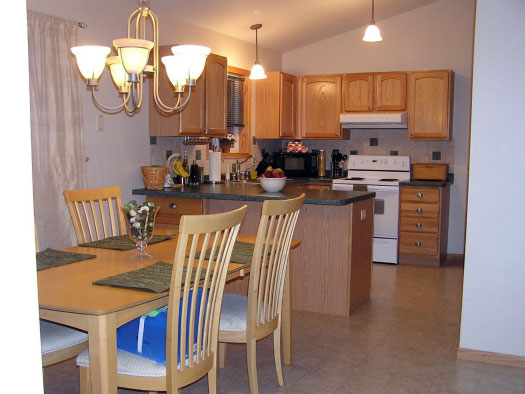
I probably could have spread this post into about eight different posts, however, I would love to get back to DIY'ing and organizing, so I am going to put a bunch of information into a single place. And my first tip is the most important of them all; have fun and be patient. I am learning something new on a frequent basis, and know I still have so much photography exploration ahead of me. It definitely takes practice! For a few giggles, let's take a peek at some photos I took at the beginning of my blogging venture:


So much has changed in five beautiful years!

Let's start with my equipment. I have gone through three cameras since I began blogging, and I can tell you that they do make a difference. Buuuuut, you do NOT need an expensive camera to take good quality blog photos. There are things you can do with just about any camera to get a good shot, and majority of the tips in this post apply to any camera. Heck, my iPhone does almost as well as my DSLR at times.
 |
| one / two / three / four / five / six / seven / eight |
- one -
I have been a Canon girl for as long as I can remember. I began with a Canon Powershot point-and-shoot and then upgraded to my first DSLR, a Canon Rebel XSi. Almost three years ago now, I realized that I really loved photography and took a major plunge by investing in the Canon 5D Mark II. I have never looked back, that camera is like another appendage of my body and I am rarely seen without it. It was a large expense, but for a gal who uses it daily, it has been worth every last penny. However, there are times I still grab for my smaller Rebel, and it still does a fantastic job. In fact, it is what I would recommend to any blogger who is looking for a DSLR for blogging at a decent price point.
- two -
Many of you probably know that using a tripod will ensure you are getting the sharpest photos possible. I try and use my tripod for majority of my photos, but there are times when I also like the freedom of just getting into a funny position to get the "money shot". Either way, a good tripod not only provides a crisp photograph, it also holds your investment, which is a very important thing to remember and consider. The first tripod that I purchased was from Target and cost around $30-$40 and it worked great with my smaller DSLR, giving me a couple of years worth of use. After I upgraded my camera, I failed to also upgrade my tripod. A few months in, the Target tripod couldn't manage the weight of my new camera and toppled over. All I can say is thank goodness for my camera warranty. I quickly purchased a heavier duty tripod that is also easy to manipulate to many positions. I may have cried when spending a bit more, but I have never had to cry again.
- three -
Let's take a moment to talk about my secret weapon... LIGHTING! This lighting kit was by far one of the most beneficial kits I have purchased over the years. Many of you have asked me how I get bright photos in my windowless rooms. Now you have the answer.
I recently photographed a storage basket in my lower level bathroom. Again, a room with no light. I actually shot the photo around 10:30 p.m.

And here is what was happening behind the scenes.

That's how I do it.
The lighting kit comes with two adjustable stands, brilliant white bulbs and light filtering umbrellas. They really take away a lot of the yellow effect that our lightbulbs put off in our windowless areas, while also bringing in extra light. As you may know, the more light you have, the lower you can keep your ISO, which will ultimately lead to crisper images.
Not only do I use the lighting kits in windowless areas, I also use them to offset harsh shadows and even aim them up our stairs when shooting the entryway. Hands down, best photography money I have ever spent.
Another tips to get rid of the "yellow" effect that overhead and lamp lighting tends to put off, is to replace the lighting in your home with bright white or day light bulbs.

- four -
Something else you may notice in the photo above, is that my camera is tethered to my computer. I only recently began doing this and it has saved me so. much. time. Raise your hand if you have spent many minutes and even hours photographing a room or a project, only to transfer images to your computer and feel a pit of frustration at how they turned out. All of that time lost, and then having to go back, re-arrange, and try again. After installing drivers for my camera directly from Canon's website (most likely also can be found on the software that came with your camera), I was able to tether my camera to my laptop. Then, photographing either directly from my camera or remotely with my laptop, after the image is snapped it feeds instantly to my screen. I can see if something looks off, if the coloring is bad, if it is too bright or not bright enough... fix it and then retake it.
- five -
We all know that lighting is such a crucial part of a good photograph (turn off overhead lights, use natural light, shoot at certain times of the day, etc...), but sometimes too much light comes streaming in, causing harsh shadows. Diffuser kits will help to block those shadows or bounce your light just where you need it.
- six -
Often times when working on a project, we like to display the tools and items needed for that project. It is just a nice gesture to give a visual of everything needed from the start. There are also times when we like to display the final result of a project, or create a solid backdrop for photographing items to be used in our Etsy shop. That is when I break out the foam board. I pick this stuff up at our local dollar store and use it to provide a nice backdrop for photographing different objects and projects.
Simple is the key here! It instantly reminds me of a project in which I laid out our picnic quilt to photograph how we use different pouches to organize items in our car. The busy background of the quilt completely took away from the items I was attempting to focus on.

So now I use foam board, which I pair with simple contact paper, different shades of paint, or even just leave white.

I prefer to use my marble contact paper to give an elegant effect, or paint the foam board in a subtle color, as white can be tricky to photograph. To snap a shot of the lightbulbs, I used the blue board I was painting above.
The nice blue backdrop brings attention to the items I was photographing, while another foam board was blocking the direct light coming in our patio door.

- seven -
All cameras should have some sort of strap as another way to protect your investment. Now, if only I was better about using it!
- eight -
The organizer in me loves to keep all of my camera gear together in one easy to access location. Because I sometimes photograph on the go, I store everything in a padded camera bag (long time JoTotes fan). The bag comes with many pockets and compartments, allowing me to store my lenses, camera cards, card reader, lens cleaner, cords, etc... all in one spot that hangs on a hook in our entry or my office.
____________________________
So now that you know all about my favorite equipment and tools, let's talk about taking that beautiful image from your camera, and making it blog-mazing.
The ultimate goal of the image itself, is to portray a story. On this blog, I try to use photographs as a way to share the process and outcome of a project and to also share moments around our home. To me, the editing process is just as important as the equipment and photo taking process. The editing allows you to crop out the junk that clutters the story, and also allows you to highlight specific components of the project and outcome. The goal is not to make the image so overly processed that it isn't an accurate portrayal, just enough to tell that story and provide a bit of inspiration.
I recently shared some updates we made to our master bedroom, so I thought I would grab a random image and go through the editing process I used.
Here is the before, straight out of the camera.

The image was one of the last images I had taken of the space, and the coloring in the room started to get warmer as the sun was setting. My ultimate goal was to straighten, crop, and get the color to a more true to life mid-day tone, while also drawing the eye to some of the key pieces in the update.
I typically do simple edits in Photoshop, however, I know that many people are terrified of it (I have been there), or do not have access to it. So for the sake of offering some tips that anyone can use, I edited this photo in iPiccy. Other online editing tools that I have used are PicMonkey and Ribbet.
Once the photo is loaded into the editing software, I begin by rotating it and using the grid to straighten it.

For this step, I try to find a line near the center of the photo to work with, and get the image as straight as possible. In the image above, I used the molding behind the bed as well as the top of the headboard. It is important to remember that there will be a small natural curve to your image, as your camera lens is curved.
Because I try to shoot most images on a tri-pod, they come out of my camera fairly sharp. However, I like to make certain elements really pop. Typically it is a bouquet of flowers or a pillow on the bed or even objects on a work surface (or the items on top of the foam board).

Using the Sharpen option, I click the paint brush to give myself the ability "Revert Mask" the painting tool. This then allows me to paint the items I wish to sharpen, again, only focusing on key moments in the image and letting everything else sit softly in the background.
My main lens is currently being repaired, so I have been using an older lens for the past few months. There is a spot inside the lens that shows up on every image I photograph. That spot is extremely distracting to my eye, so I use the Clone tool to remove it.

The clone tool also makes a great vacuum! Random crumbs on the floor or table draw your eye away from the main story, so use the clone tool to clean them up quick. One of my favorite quick editing tools.
Instead of using the white balance feature on my camera, I white balance during editing. The goal is to rid the photo of unnecessary yellowing that can occur if shooting during a warm time of the day or under interior lighting.

Many of the online photo tools offer a temperature slider to adjust your white balance, while Photoshop has a color balance option.
I also tend to shoot my images a bit on the darker side, to preserve some of the quality, and again do the brightening during the editing process.

A simple pull on the Curve tool will brighten the image just a smidge, really allowing it to shine on the screen.
To be sure I don't miss anything in a shot, I tend to shoot a little wider and then crop almost each image I take. The point of the crop is to remove some of the clutter that is taking away from the focal point of the image.

In the image above, the random piece of molding in the upper right corner was pulling my eye away from the pillows. I wanted to crop out the molding in the corner, but in doing so, I also watched where my crop lines were landing to be sure I wasn't creating new distractions.
Last but not least, you can add a little extra vibrancy to those items you want to stand out, just as you did with the sharpening process.

Through some of the editing and transferring of the image from life to camera to computer, you may lose some color. I like to add a bit of that back with the vibrancy tool, once again, painting only key items and leaving the rest alone.
And I was left with this.

And a quick side by side for comparison purposes.

A few other tips for managing and creating images for the blog:
IMPORTING AND SAVING IMAGES
I always start by pulling all of the images from the project off of my camera and into a single folder titled with the project name. I then look at each image, and pull my favorites into a "To Edit" folder. Those are the images I edit for my blog post. Once the photo is edited, I save the full size of that image in an "Edits" folder. I also be sure to name my photos according to the project and post. This will help people find your blog if someone is doing a Google image or web search using the key words you used in your photo naming process. So yes, I have the "To Edit" version and the "Edited" version both saved on my computer. I do this because I never know when a publication will want or need an image and may need it in either format. Once all of my images are edited, I then resize them to fit my blog. Before I knew better, I would load all of the full size images into my blog and then have blogger compress them down. This was causing so much lag and delay on my site, so now I resize them to 500 px wide for portrait and 550 px wide for landscape images, and also compress the images for web.


By resizing and compressing, I am now uploading an appropriately sized image to my blog. So much better. And I apologize, I always do that in photoshop so that is what is shown above. However, I believe you can also do this step with the online editing tools.
Once I have my photos done and uploaded on my blog, I then delete all of the images on my computer that I never used from the project. Then, every couple of days I move all of my blog post photos to our external hard-drive as well.
MORE IS BETTER
I know that I typically spout that "Less is More", which I do believe to be true with most things in life. But not when it comes to photography. When I am photographing a project or room, I take about 100 photographs. I take them from far away, from up close, from down low and up above. I like to have a lot of options to select from when writing my post. What doesn't get used ends up in the trash, but I am always glad I took the time to take a few extra shots.
LIGHTING MATTERS
I know I have talked about lighting already, but it really can make or break a photo. I have been known to try and plan my picture taking around specific times of the day, when the sun is directly above our home. When that can't happen, that is when I use both equipment and editing to manage the changes in light. As the sun goes down, your rooms will be warmer. Shooting right away in the morning may mean direct light that causes harsh shadows. Where your overhead lighting is aimed, will also determine your shadows. Yellow lights create yellow images, blue lights create white images. In the game of photography, lighting is either your best friend, or your enemy.
SHOOT REMOTELY
And no, I didn't just give you permission to jet set off to a remote location. I am talking about using a remote shutter to trigger your camera. I am not going to lie, I typically prefer to hold my camera when photographing a space. It is easier and quicker to just get myself exactly where I want the photograph taken from, and snap. But for the really good quality images, it is best to use a tripod and then take your photograph with a remote (or with your computer using the tethering cord). Even just your motion of pressing the trigger on your camera, will cause enough movement to slightly blur an image.
DO WHAT YOU GOTTA DO
As I mentioned, sometimes I just like ditch the tripod and organically photograph with camera in hand. Some of my favorite shots are done this way... but I may have looked a bit odd in getting those perfect angles. Scrunched up faces leaning back as far as possible? Check. Laying down on the job? Check. Climbing and straddling? Check and check.

I say the funnier you look taking a picture, the better the picture will be.
CONTINUOUS EDUCATION
I have come a long way with my blog photography over the years and I am learning something new all of the time. I also have a long wish list of items I still hope to learn in the future. Something that helped me tremendously was taking an Intro to Photography class through a Community Education program at a local University.

That class really helped to get me familiar with my camera and gave me the confidence to begin shooting in manual mode. And when I started photographing in manual mode, it wasn't pretty. Most days I would start in manual and end in auto just to get the job done. But practicing everyday has given me more confidence in what I am doing and now the dial never moves. Manual every day and I LOVE it. I have also heard really great things about Shoot Fly Shoot in terms of classes.
LENSES
I am not super familiar with which lenses are best for interior photography (something on my list of things to learn), so I will guide you towards Google with those questions. Majority of the photos taken over the past few years on my blog have been with either my main lens, which is a Canon EF 24-105 f/4, or my Tamron 28-75 (back up lens). And sometimes even my iPhone.

Speaking of iPhone, real quick because I get asked this quite a bit, my favorite photo applications are shown below:

With all of the great and recent options added to the Instagram app, I haven't found the need to do much editing outside of it any longer, however, below are a few of my favorites just in case:
Camera+: I shoot all of my photographs in this app, I prefer the camera and editing options over the standard built-in iPhone camera app.
Retouch: Retouch allows you to quickly and easily remove unwanted items from your photo. I have used it to remove a random person walking behind us on the beach, and another time to remove power lines jetting out of my kiddo's head. Much cheaper than surgery... It is also a great vacuum, just like the clone tool I chatted about above.
moreBeaute2: I love to use this for giving my photos a pretty white balance or glow. Really great for snow or our white fluffy dog.
ProHDR: My favorite editing tool for scenery photos. It allows you to really enhance the colors and overall statement of the photo.
Squaready: Takes a standard sized photo and turns it into a square. This is perfect for Instagram because you can upload the Squaready version without losing any of the image.
Shutterball: A cool toy for taking an image remotely with your phone.

PS Express: Phone version of Photoshop. Great for cropping, straightening, sharpening, etc...
I know there is SO much more we could chat about on this subject, and I am happy to answer additional questions in the comments below if I missed anything. Aside from learning some basics about aperture, shutter speed and ISO at the community ed class, everything else I have learned over the years has been by Googling for a tutorial or watching You Tube videos. So much great and free knowledge out on the internet... don't you love it?!
And some final words of photography wisdom from a few of my fellow friends:
 "I think all bloggers should ask Santa for a 50mm lens and a tripod. Both transformed my photos. The other thing I have learned over the years is that it's all about natural light for me. I cringe when I look back at my older photos. Turn off all of your lights and throw open every window. Try to schedule photo shoots in your home when you know you have the best natural light. When the natural light is beautiful, it also cuts down on any editing you may have to do to the photos." - Courtney, A Thoughtful Place
 "Take photos from different angles and shoot one subject for a significant amount of time, taking lots of pictures, adjusting your camera settings as needed. Sometimes you get the best shot right away, but most of the time, it’s those last few that are really great. I tend to get into a photographing groove after I’ve been at it for about 20 minutes. Think about leaving “empty” space if you want to add graphics to your that don’t interfere with the picture. Also, take photos that you don’t intend to post on your blog, just for practice and fun." - Megan, Honey We're Home
"Natural light is king! It's not always possible, so a DSLR and tripod are a must." - Cassie, Hi Sugarplum
 "I imagine everyone is going to say use natural light - which really is the #1 tip if you want beautiful, crisp photos.
But I would also like to add, when you think you've finished taking your photos, try and take a few more from different angles - try flat lays and take photos from above, zoom in for detail shots, put the camera on a diagonal...Check out your favourite bloggers and try replicating the format of their photos to inspire you. By experimenting you'll find some amazing new shots and then just practice, practice, practice!" - Serena, Pretty Fluffy

Check out more from this blogging series here:
A Day in our Life
The Bread & Butter of the Blog
Ten Things I Have Learned Along the Way
0 comments:
Post a Comment