
On one hand, this was one of my least favorite projects. There is NOTHING exciting or glamorous or pretty about deep dark storage rooms (that also double as a utility room). The space was messy, cold and unfinished. It was also stacked with pretty much everything we have been avoiding for the last year (again).
On the other hand, I was quickly reminded that what I love so much about organizing, is not just that overwhelming joy in finishing a project, but the small projects that help get us there. You know, the painting, the pretty papers, the labeling... basically I enjoy the creative aspect and that is a huge driving motivator when I work on projects.
And that is not to say that we couldn't do all of that in the storage room. Although this is more of the man cave of our house, I did get to do a little painting and even lined some shelves, just to stay inspired to keep at it. But when I asked Bryan if he wanted me to paint the pegboard or trim it out or dip the screwdrivers (ha), he showed very little interest.
So yes, this project challenged me. Big time. We started working on it over a year ago (seriously, how does a year go by so quickly!?). Then, after organizing all of our paint supplies, we changed our minds and removed the paint we had spent so much time organizing (oops). From there, we organized the closet under the stairs, our garden shed, and our garage. Then we then built new paint storage and ultimately got distracted with more fun and entertaining projects. Every day that went by meant that the storage room was collecting more and more clutter. And with very few finished and working systems, everything was being piled within bins in the center of the room.
Here is what the storage room looked like last year when we started. Warning, the following photos are not all pretty. Brace yourselves.

Obviously, keeping the room piled as shown was dangerous, and on top of that, there were so many things that we couldn't find or access and even forgot we had.
You can read about the beginning of process here. After painting the cement floors, painting a free hand-me-down dresser and installing some new shelving, we were left with this.

Ever since, our piles have been moving from one storage room (shed, garage, closets, etc...), to the next. And the storage room was the very last room on our bucket list to get organized before starting our kitchen project. Eek!
And that my friends is what drove me to finally get stuff done! Bryan and I were in need of a little project-free down time, so we took a few days away last week to visit his parent's place down in Florida. If you live in Florida, consider me jealous. GORGEOUS state. Anywho. I have another trip coming up this week (so please hang with me during the lighter posting schedule), which essentially gave me a few quick days to finish the storage room once and for all. My goal was to tackle it by using 100% of what we already had on hand; no purchases allowed. I always love a good challenge!
But why the mad dash this week? Well, after we finished making room in our garage for working on the kitchen, all of our tools ended up in piles and bins in our storage room. Of course, we will be needing many of those tools over the upcoming months. So having them easily accessible and super organized will be a HUGE sanity saver. Also, the storage room is located right below our kitchen, which means we will need to have access to plumbing, gas and electrical. There is no way we are going to DIY a kitchen, with the utility room below it such a mess. Speaking of, when we returned home last week, this is close to what the room looked like (pic taken a few weeks ago).

Told ya! Not good.
With kitchen floors ordered and being delivered next week, this room had to get organized STAT! So I did what I always do, and pulled everything out of the room to give it a blank slate. I then put on Netflix and sat in the middle of my family room floor for the past three days, sifting and sorting. Here is a halfway through progress shot. Another great reminder that it always gets worse before it gets better.

The only breaks I took were to play in the snow, read stories in our fort, and make dinner. After every last drill bit and tool was sorted, my hands were raw and I was tiiiiiiiired.
I get asked a lot about the actual process of organizing, so here is how it goes down. I start by emptying out the drawer, closet or room I am working on. I prefer to work with a blank slate. I then sit and sort and sort and sort some more. I keep a giant bin next to me for trash, and another for donate. I also keep a rag and all purpose cleaner nearby so that I can wipe things down and get them looking shiny and new again. Hand sanitizer is key, as I touch a lot of items in a short period of time. I also wear old clothing because I am bound to get dirty. As I sort, I create piles all around me, placing items into specific categories. I try to find empty bins for these things as I go, but if I don't have a bin, I create a pile and find storage when every last item is touched.
And here is the storage room now!

It feels SO big and spacious now! I can easily walk around the entire room and not worry about tripping on something or scared that some deep dark basement creature is going to bite my ankles.
Let's start with the tools! When we started this project, we inherited an old dresser that we always intended on using to hold our small tools. We gave it a coat of paint, lined the drawers with cork (to prevent items from sliding around), and put it on rolling casters. But that was the end of it, and a year later, it was not functioning as anything more than a clutter catcher.

The box in the wall with the cords coming out of it is our component cabinet for all of the electronics in our family room. Not only were the cords driving me nuts, I felt like we were losing so much vertical storage. Because the cabinet backing was indented, we were able to install more pegboard (and re-route the cords through the side). Such a storage score for us, as now it holds all of our most frequently used items.


It is so nice to have everything organized out in the open (yet sort of concealed since the door to the room is always closed). Easy to find things, easy to put things back! I especially love having a charging station set up for our cordless drill. #littlethings

Also on top of the dresser is an old organizer that now holds miscellaneous small tool pieces and hardware.

It was previously hung in our garage on the wall, and before heading into the storage room it received a quick cleaning as well as a coat of pretty plum spray paint. I also labeled all of the drawers by printing labels onto clear sticker paper.

We had a few extra items that didn't fit on the top of the dresser, so I painted a few spice racks I picked up at IKEA a few months back, and we attached them to the side.

As I mentioned, the drawers were lined with cork. I also lined them with empty plastic shoe boxes, which ultimately made really great drawer dividers for all of our random tools.

Many of the specialty hardware items were sorted down into stackable plastic dividers.

The remainder of the tools and hardware were paired down and placed in the remaining shoe boxes on some shelves across the way.

I created the labels on my computer and printed them onto white sticker paper. Super quick and easy solution to labeling a stack of bins. Peel and stick baby!


The lower portion of the shelves hold all of the larger tools, such as our circular saw, jig saw, socket set, palm sander, Kregg Jig, Dremel, brad nailer, etc...

Our air compressor as well as a few other random items fill the remainder of the attached shelves.

The shelves on the opposite side of the room hold all of our holiday bins. We have quite a few of those, so they take up most of that real estate.

I organized the bins last year while putting away all of my Christmas decor, so for now, I pretty much left them alone. I did add some tags to the fronts of the bins, which will allow me to write down the contents of each bin this year while I am re-packing things up. That way I won't have to play any guessing games when looking for a tree skirt or my favorite holiday ornament down the line.

For the labels, I created them on my computer and printed them out on regular white paper. Because I wanted to be able to easily pull out the labels to write on them, I used ID badge holders I found in my labeling supply box.

I purchased the ID badge holders at Staples quite a few months ago, but I am guessing they still sell something similar. I used my paper slice to remove the top portion of the holder, leaving me with a clean and clear pouch. I affixed the labels to the fronts of the bins with some mounting strips. I am also sharing the label template with you for free, which you can download here.

After everything was put back, we had nice open spaces on the corner portion of our shelves. You wouldn't believe my excitement when all of our suitcases and travel gear tucked away perfectly inside!

And those boxes you see making an appearance on the left side of the picture above, are the memory boxes I organized almost a year ago to this day. They are still working beautifully for us!

Earlier this year I purchased a set of FLOR Carpet Tiles from a flash sale on Zulily. They do such a good job of keeping our feet warm while working in the room. And of course I love that I can wash them and that they are color happy! I was school girl giddy to finally get these puppies on the floor!

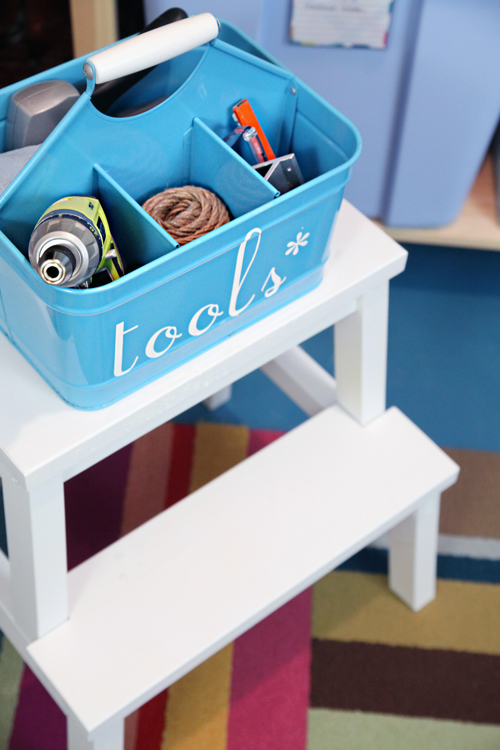
The caddy on the stool is one that I typically use for smaller, around-the-home projects. It is stocked with a few basics that I can just grab and take with me (see more here). For bigger projects, we can just load it up and tote it to wherever, just as long as everything gets put back when we are done. That always seems to be the hardest part...
And that completes the tour!
No giant organizing project is worth this many words without celebrating the super exciting before and after shots of the outcome.


Now, if only it can remain somewhat orderly through this next very exciting project ahead!

0 comments:
Post a Comment