

After the beams were in, we had to wait for inspection to be done prior to fixing the sheetrock. That was done Tuesday morning, and woohoo, we passed! You better believe that sheetrock started going in on Tuesday evening!

My husband grew up helping his father with drywall, and with his guidance, the walls were well on their way to being finished within a few days... Our other task for the week was caulking all of the seams in the ceiling.

I blog for a lot of reasons. I love looking back at the evolution of our home and projects as well as the social interaction blogging brings, however, we also share our mistakes and lessons learned in hopes of helping others down the line. We have made a few mistakes in terms of this renovation, and one was beam and plank placement.
When we started the project, we planned to space our beams four feet apart, knowing we had support running up in the trusses every two feet. When we had the electrical pulled during demo, to reduce the number of trips being made by our electrician, we also had all of our ceiling lights measured out and installed. Prior to planking, we started out by measuring and marking our beam lines every four feet from the edge of the far wall. We did this so we could end our planks under beams, preventing any seams from being visible. After we were 3/4 of the way through planking, we realized that where we planned on placing our beams would come super close or completely cross paths with three of our ceiling lights. We could not figure out how we missed that earlier, with all of the planning and measuring. So we had two choices, move the lighting, or move the beams. Because the beams hadn't been installed, we decided to move the beams.
With that, we had a few spots on the ceiling with seams in the planks where they met end to end. Lesson learned, those seams can be hidden by beams if you hash things out correctly before starting.
In cold Wisconsin, we experience a small amount of expansion and contraction with woodwork. We researched a few patching options, and opted to go with paintable caulk, which allows for some flexibility.

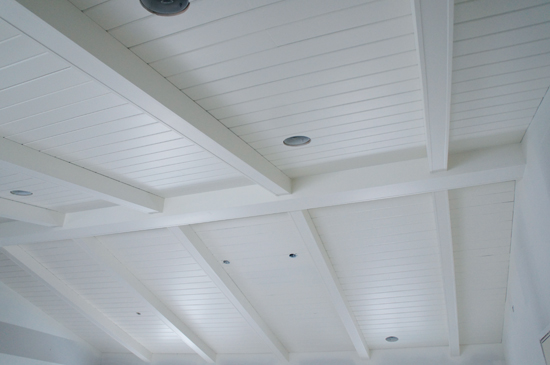
We caulked every nail hole, seam and all of the planks to give us a really pretty seamless look. So even though we had a little mishap, the caulk did a beautiful good job in hiding those unexpected exposed seams.
By Saturday morning, the ceilings were ready to be sprayed!

We had a lot of discussion about spraying the ceiling. They sounded something like this:
Me: "Honey bug, we are a blog, we have to spray our own ceiling!"
Bryan: "I am not so sure. I think we should hire it out."
Me: "No way, it will be expensive, I know we can do it!"
Bryan: "Let me convince you otherwise."
And he did. We were quoted $200 by a local painter to have our ceiling sprayed, if we supplied the paint. After evaluating the options of purchasing a paint sprayer or renting a paint sprayer and doing it ourselves, never using a paint sprayer before and potentially creating drips and blotches, $200 sounded like the better option. And it was for us.
We left Saturday morning at 9:00, and after receiving a text of the progress, we were already really excited to get home and see how well the paint was covering.

We went with Benjamin Moore's Simply White in an eggshell finish. It was a really close match to the IKEA white cabinets we are installing. This is the point at which I was also super relieved that we spent a little more for primed boards. Coverage was amazing.
One coat later...

And when we returned home after the second coat was applied, I ripped that painter's poly off like a band-aid. And I didn't scream in pain, I squealed with delight!

I mean you guys, the ceiling is GORGEOUS! No photo can do it justice, I am madly in love with our glorious white beamed ceiling!
Now, let's talk paint... Not only was the ceiling ready for paint, so were our walls. It was time for me to settle on a color once and for all, and just get it done. The problem I was having is that all of my swatches looked different on different walls at different times of the day. If l loved a swatch on one wall, I didn't like it on another. That happened for every single color I tested. So I realized that I just needed to make a decision and get something on all of the walls.
After most of the gray | green | blue colors were not jiving with my vision, I tried to resort to a simple gray. My sweet husband voted no. He wanted some sort of color on the walls, and felt I was using the gray as a cop-out. I was happy he cared enough to challenge me, but what the heck? So, after 1,089 Google image searches, 324 hours of looking at swatches on the walls and in the paint store, and 17 opinions from friends and family, I went with Benjamin Moore's Quiet Moments. We are a colorful family and we do need color on our walls. I don't want the space to become too trendy or modern or sterile, so I went back to the grey | green | blue scheme that I had been toying with for the past four weeks.

I started painting Saturday afternoon and found a little helper along the way... any guesses who that may have been?

And if I thought colors looked different on different walls... boy was I in for a surprise with this one. It looks different on different walls, and throughout the course of a day from morning to evening. Sometimes it reads really gray, while other times it is a pretty minty green. I sort of love it, I sort of hate it. Ha!

So, in terms of the color, it may change before this entire renovation is over. But I also know not to judge a color just yet. There have been a few times when I have painted a room and wondered if I made the right choice, only to fall head over heels in love with the color once everything else was in place. Fingers are crossed that is what happens with this project, but if not, it is just paint.
And in the spirit of picking and sharing colors (finally!), here are a few more selections I am toying with at the moment.

We have white cabinets going in around the back wall of the kitchen (see more here), while we are planning on doing a dark gray island. The blacksplash I am leaning toward is the marble herringbone, although, I really love the patterned blue option, so I am trying to find a way to work that into our home somewhere. The counter will be a neutral stone, and then of course some splashes of color through floral fabric on a roman over the window and nearby throw pillows.

I also scored a vintage chandelier on Craigslist for over our dining table, more on that in a future post. I am hoping that the combo of some of the old and new, whites and woods, soft tones and bright accents, will be the perfect balance of a family friendly room that doesn't feel too serious or boring.
While I painted, Bryan started assembling cabinets! Aside from the island, all of the cabinets have arrived and now we are hoping we don't run into any problems with missing pieces. More finger crossing happening now.

Ready for mistake number two? A little over a year ago our original refrigerator died a long and painful death, and knowing a kitchen update was in our future, we felt OK purchasing a new side by side option. We scored a great deal and thought we were going to be high-fiving ourselves for the early purchase. Little did we know that in order to really maximize our kitchen and island layout, we would need a counter depth fridge. A counter depth fridge is not standard, you actually have to seek them out. We did not purchase a counter depth fridge. Sigh.... So, our current fridge will either be sold on Craigslist, or replace our freezer chest in the garage because we avoid that deep hole of frozen food like the plague.

Otherwise, so far, so good! Our cabinets are really tall, which I LOVE. We are actually gaining storage from this renovation, and tall cabinets are part of that awesomeness. They are so tall, that we had to use an oscillating tool to slice a small piece of our new beams. But once the cabinets are installed, one would never know.

And see how the colors on the wall keep changing? Crazy town. Also, my DSLR has been away being repaired for weeks now, so my little point and shoot has some crazy auto-coloring happening. All that said, here is what the space was looking like as of this morning.


All day today I just kept walking up stairs and standing in the middle of the big, empty area. There are no words for the feelings of joy that flow through my veins by the second. The ceilings feel so tall and grand. And now that the walls and ceilings are painted, not only does it feel bigger, it finally feels like one meant-to-be cohesive space.


You can follow all of the kitchen progress here.
0 comments:
Post a Comment